

One Room Challenge: Week 4 of Parisian Picture Frame Moulding DIY
I’m behind, but making progress on my picture-frame moulding.
Here’s a list of things that have happened on my One Room Challenge project since my last post laying out my wackadoodle idea to do all new wainscoting in my living room, despite having perfectly good beadboard wainscoting already there.
Here goes….
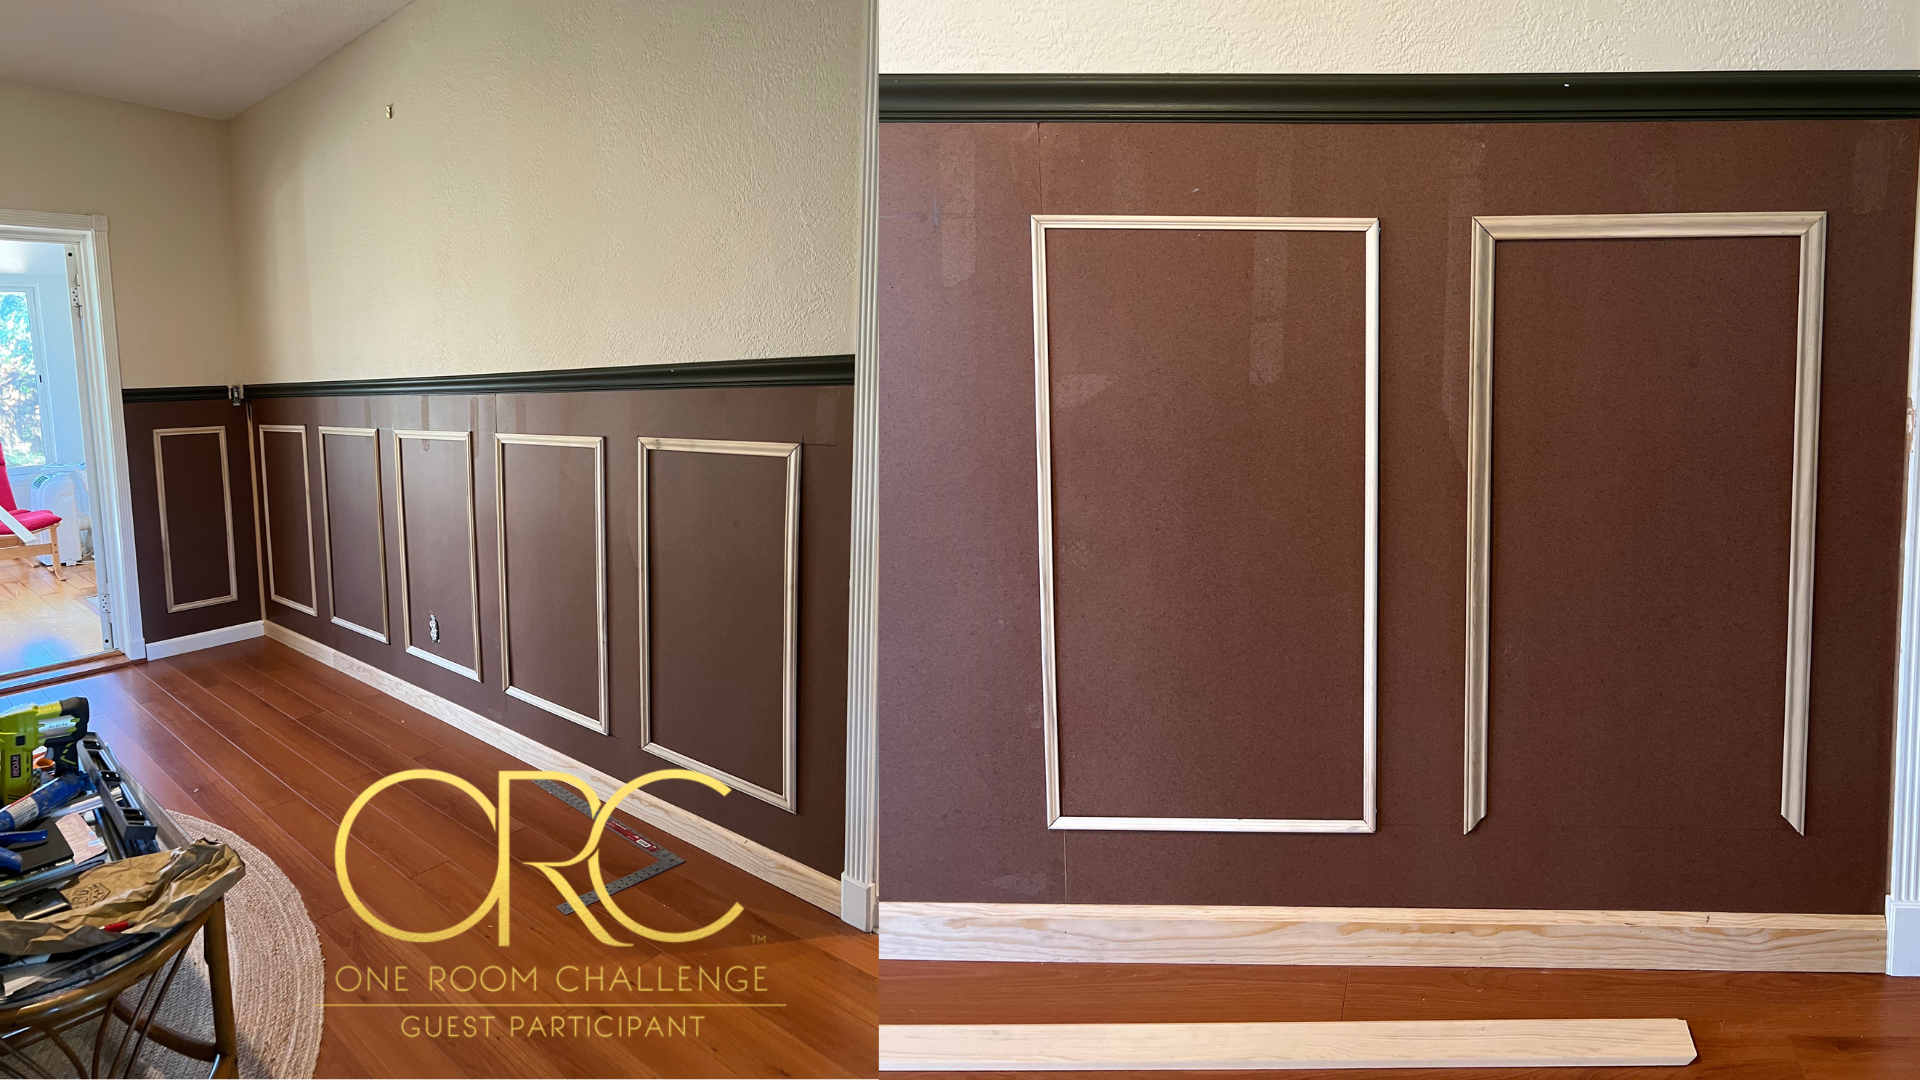
- Bought Eucaboard (a flat wall panel thing) at Lowes. Got it cut at the store because it’s huge. Struggled to fit it into my Honda Accord until a good samaritan gave me a hand. There is good in this world!
- Borrowed my dad’s miter saw, an actual antique and likely a first edition of man’s first miter saw, circa 1667.
- Bought and cut baseboard AND chair rail with little to no issue. Feeling good! The beveled cuts fit together and I feel like a magician.
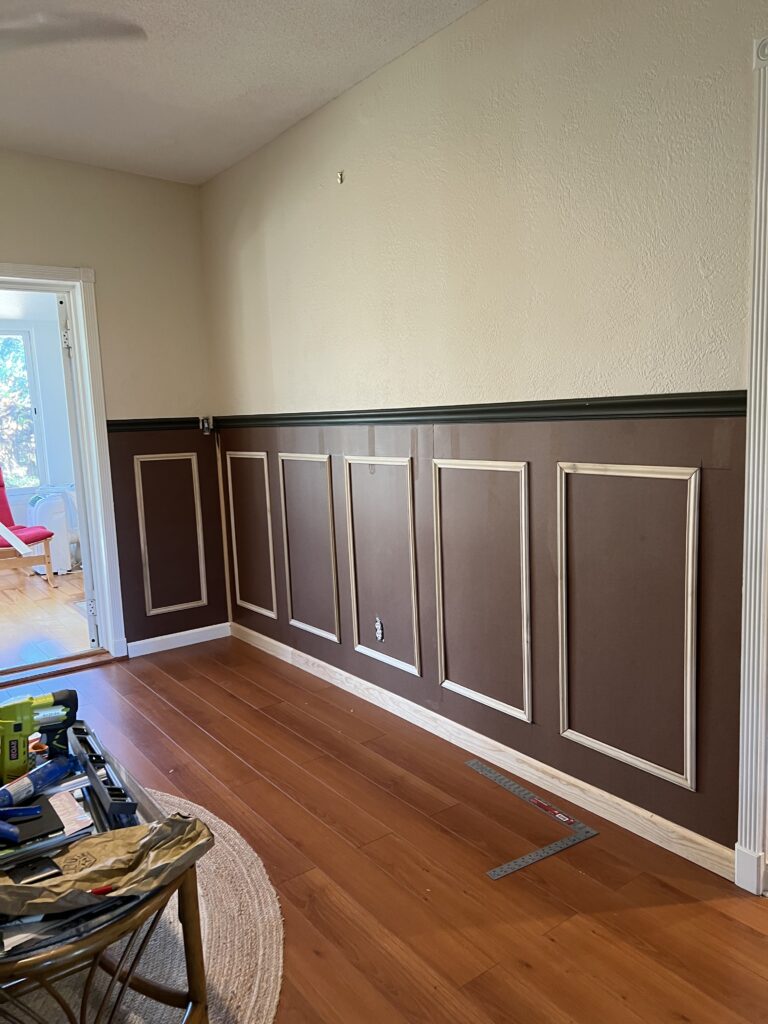
- I mount the Eukaboard, baseboard, and chair rail to the wall and by god it’s level.
- I purchase itty-bitty moulding for the picture frames. It’s not the smallest you can get, but it’s not the biggest.
- I go to cut the moulding with the miter saw and it is damn near impossible to cut to the precise measurements that I’m needing (down to the 1/4”). Also, my dad’s hangry-old-man miter saw is eating my butter soft moulding for breakfast.
- I text my dad and tell him his miter saw is disrespecting my delicate moulding.
- He says I should’ve used a ”hand miter” for that job. In typical father-daughter fashion, I wonder why he didn’t tell me this in the first place.
- I drive over to my parent’s house to get the hand miter, but on the way I wonder if I might want thicker moulding anyway. Now I can’t stop thinking about what that’ll look like.
- Back to Lowes. I’m getting 2 pieces of thicker moulding just to test it out.
- I like the thicker moulding.
- Back to Lowes. Returning 7 pieces of aforementioned butter moulding. Getting the thicker stuff. It’s more expensive, but I’m so deep into this project I will not cut corners (pun!) at this point. I’m all in. I spring for the pricier moulding and comfort myself with the thought of how I’ll spend the credit card points I’m racking up.
- The hand miter is laughable at this point. Back to the cookie-monster miter saw for this project. But first…math.
- Being more careful with my $$$ moulding, I take another good hard look (and measure) of the wall. I start out using the imperial measurement system (inches) and then switch to metric (centimeters). At one point I’m using both. I google ”What does 9/10 of an inch look like on a tape measure.” I briefly get mad at my public school education for not spending more time on how to read a tape measure. I blame this for all my measuring woes.
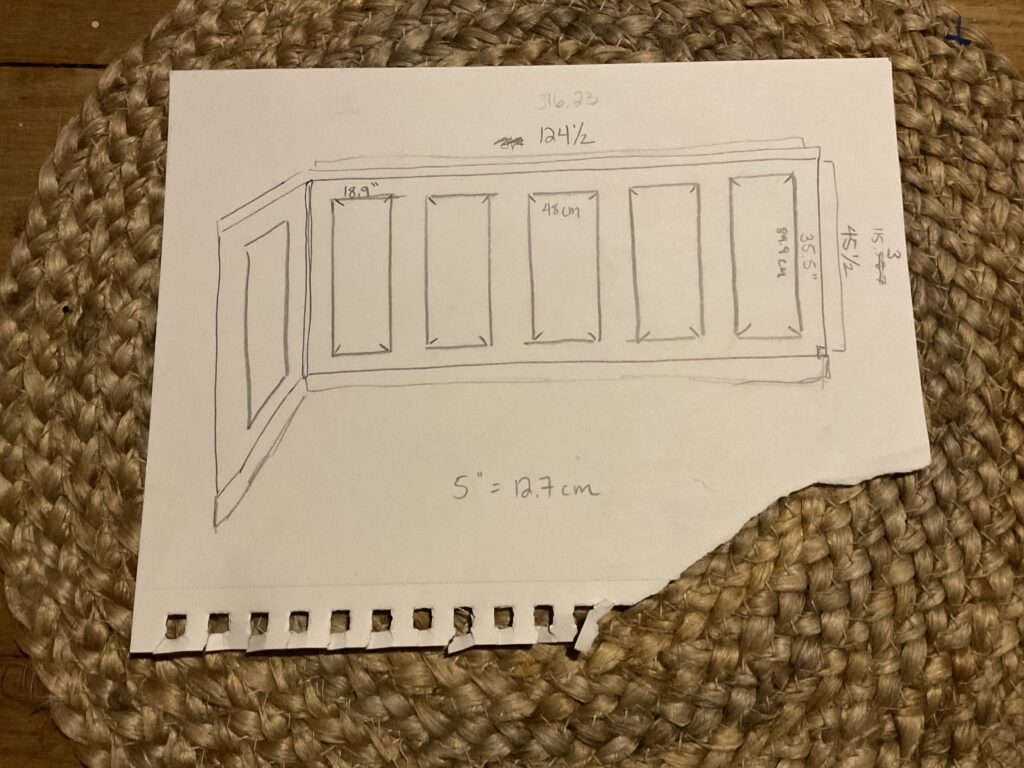
- I finally land on some measurements and make guides on my garage floor using permanent marker. And if you’re wondering – the miter saw is on the garage floor because I don’t have a work bench, okay? I’d love one. Maybe some day. Until then, down to the floor we go.
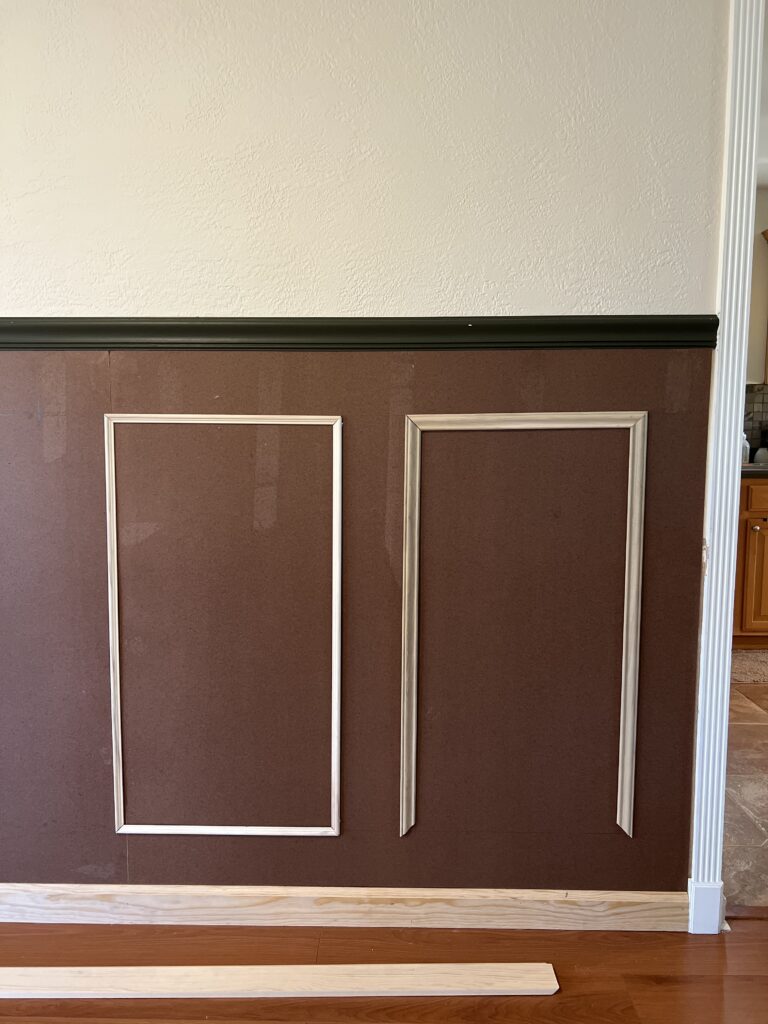
- Hours later I have all of my cuts. SPOILER. I fucked up on several and I have to make minor adjustments, and in one case where I screwed up my 45 degree angles – a completely new cut. But, I’m learning that small errors can be fine tuned with my orbital sander.
- I use museum putty to put the picture frame cuts on the wall because I still don’t completely trust myself to use liquid nails (as I should, there were more adjustments).
- It looks gooooood. I pause to give my dog a bath.
- Now I get out the liquid nails, my Ryobi brad nailer, my level, and my 5” chunk of wood that is my guide (all picture frames should have 5” around on all sides…chair rail to top, baseboard to bottom, and between each other….get it?)
- This takes longer than I anticipated but I finally get all the picture frames on the wall with liquid nails and brad nails.
- My back is killing me. I make a trip to Total Wine as a reward for a day of math and manual labor. Hard work is done! (except I have to do this on the opposite wall but we’re not talking about that right now…
Up Next: filling nail holes, caulking, priming, and finally…..painting. Feeling close to seeing my vision come to life and I hope it doesn’t look like a sad wannabe Hogwarts library, but I don’t think it will…
I briefly pause to relish in the fact that this is my home and I don’t have to cater to anyone else’s design choices which is pretty freaking awesome. So if I like this and no one else does….that’s fine!
Good night and see you on the next update!